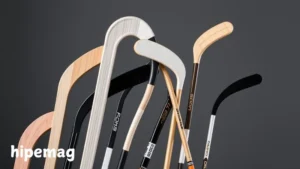
Drawing a hockey stick can be an exciting and creative challenge, whether you’re an artist or a sports fan. The sleek lines and distinct hockey stick shape make it an interesting subject to capture. This step-by-step guide will show you how to easily draw a hockey stick, from simple sketches to adding finer details.
Essential Materials and Tools for Hockey Stick Drawing

Before you start, gather the following materials:
- A pencil (preferably an HB or 2B)
- An eraser
- Paper (any kind of drawing paper will work)
- A ruler (for straight lines)
- Colored pencils or markers (optional for adding details)
Step 1: Draw the Blade
Start by drawing the blade of the hockey stick. This is the most prominent part of the stick, so getting its shape right is important.
- Begin by drawing a slightly curved horizontal rectangle to represent the blade.
- The top edge of the blade should be straight, while the bottom edge should curve gently. The curve is typically shallow and smooth.
- Ensure that the blade’s length is proportional to the rest of the stick. It should be about one-third of the total stick’s length.
Step 2: Sketch the Shaft
Now, let’s add the shaft of the hockey stick, which connects to the blade. The shaft is usually long and slightly tapered.
- Using a straight line, draw a vertical line extending upward from the top of the blade.
- The shaft can be straight or have a slight curve, depending on the style you want to depict.
- As you draw, use a ruler to keep the lines straight. The shaft should be slightly wider at the base near the blade and taper as it moves upward.
Step 3: Add the Grip
Next, we need to add the grip section of the stick. This is where players hold the stick, and it often has a textured or patterned surface.
- At the top of the shaft, draw a small section that is a bit wider. This represents the grip area.
- To make the grip look realistic, you can draw a series of horizontal lines or diagonal lines across this section to suggest texture. This is often seen on actual hockey sticks for better handling.
Step 4: Refine the Stick’s Outline
Now that you have the basic shape of the hockey stick, refine the overall outline to make it look more realistic.
- Erase any unnecessary lines from the initial sketches and tidy up the shapes.
- Use your pencil to add subtle curves to the shaft if you want a more dynamic look. Most modern hockey sticks have slight curvature in their shafts, adding flexibility and style.
- Pay attention to the blade’s angle. Make sure it’s slightly tilted downward, as it would be when a player is preparing to shoot or pass.
Step 5: Add Details and Texture
To make your drawing stand out, add details that make the hockey stick more lifelike.
- Draw the logo or markings you see on actual hockey sticks. This can include small details like the brand name, model number, or other sponsor logos.
- If you want to add more realism, create light shading on the stick, particularly on the blade and shaft. This will help convey the 3D shape and give it depth.
- Add texture to the blade and shaft, where the stick may have been worn down from use. You can create small crosshatching or stippling for a weathered effect.
Step 6: Final Touches
Once you’re happy with the overall structure, add some finishing touches to make your hockey stick drawing look polished.
- Use an eraser to gently lighten any harsh pencil lines and create a more natural transition between shaded and unshaded areas.
- If you want to add color, use colored pencils or markers to color in the blade and the shaft. Most hockey sticks have a sleek, black or dark color, but you can get creative with your design.
Step 7: Enjoy Your Drawing
Now that you’ve completed your hockey stick drawing, step back and admire your work. Whether you’re planning to use this as part of a larger sports illustration or simply enjoy drawing, you’ve successfully captured a key element of the game!
Tips for Improving Your Hockey Stick Drawing

- Study Reference Images: Look at photos of actual hockey sticks for inspiration and to understand the small details better.
- Practice Makes Perfect: Don’t be discouraged if your first attempt isn’t perfect. Keep practicing to improve your technique and accuracy.
- Use Different Perspectives: Experiment with drawing the hockey stick from different angles. For instance, try a side view, a top-down view, or a slightly angled view for variety.
- Add a Player or Puck: To take your drawing further, consider adding a player’s hand gripping the stick or a puck at the end of the blade.
